Your motorhome is more than just a vehicle; it’s your ticket to adventure, a cosy home on wheels,...
If you own a motorhome, you’ll most likely have heard about floor delamination and the issues it can present. Certainly, it’s one of those things you can’t afford to ignore. Whether you use your motorhome sporadically, or all the time, having a stable floor in place is essential for both comfortable living and the longevity of your motorhome.
In this article, we talk you through what you need to know about floor delamination, explaining why it happens, why you shouldn’t overlook it, and - most importantly - how to fix it.
What is delamination?
Put simply, delamination occurs when the layers of your motorhome’s floor separate or come unstuck. Motorhome floors are typically constructed using a sandwich-style technique, where multiple layers, such as plywood and foam, are bonded together to create a strong, lightweight structure. Over time, these layers can lose adhesion, causing the floor to feel spongy and springy underfoot.
This isn’t just a minor inconvenience. If left unchecked, delamination can worsen, leading to more extensive damage and potentially compromising your motorhome’s structural integrity.

How does it occur?
Delamination is often the result of wear and tear, damp or a combination of the two. It can be caused by water leaks from poorly sealed windows or doors, or the plumbing, which then allows water to seep into the floor. Over time, the moisture weakens the glue that holds the layers together. Prolonged exposure to high humidity can have a similar effect, too, especially in older motorhomes.
Additionally, excessive weight or pressure from regular foot traffic (or heavy furniture and appliances) can gradually put stress the floor, particularly if the glue is already weakened. Once delamination begins, the affected area can spread, as weakened sections then place stress on the surrounding layers.
Why you shouldn’t ignore it
It can be tempting to put off dealing with delamination, especially if the issue seems minor. However, ignoring it can lead to bigger problems down the line. Left untreated, areas of delamination could compromise the floor’s strength and may spread to other parts of your motorhome.
If you plan to sell your motorhome in the future, a delaminated floor can significantly reduce its resale value. Also, the longer you wait, the more extensive and expensive the repair process is likely to be, so catching and addressing delamination early can save you a lot of time, money, and hassle!

How to fix floor delamination
A DIY repair
If you’re a confident DIY-er, you can often tackle minor delamination yourself with the right tools and materials, as there are delamination repair kits available that you can buy. A simple internet search will guide you in the right direction.
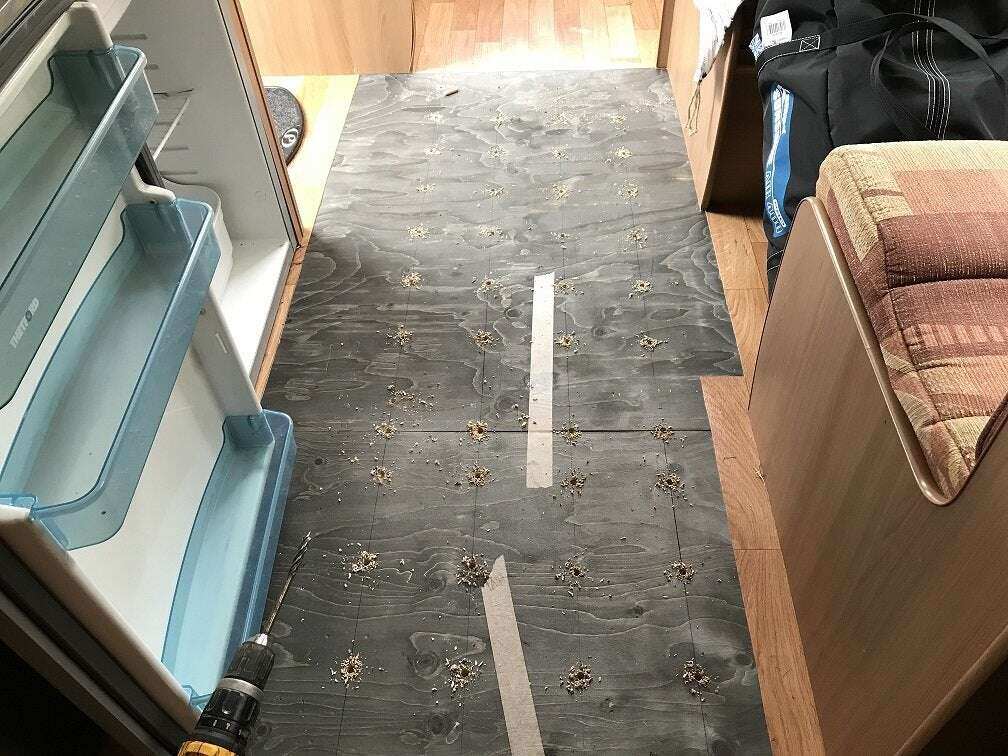
In essence, you would start by identifying the affected areas by walking around your motorhome, and marking any spongy or uneven sections - you should remove the carpet first to get a better idea of what’s going on. The next step is to carefully drill small holes into the top layer of the floor in the delaminated area, ensuring you don’t go all the way through.
Using a specialised syringe or applicator, you’ll then need to inject your chosen adhesive/resin into the holes - this will bond the layers back together. The next step is usually to drop wooden dowels or bungs (the same size as the holes you’ve drilled) into the holes. When you’ve finished this, you can place heavy weights over the repaired area to ensure the layers are pressed tightly together as the adhesive cures. Once the adhesive has dried, you can sand down the treated areas to make them smoother and then replace the carpet and furniture.
There are lots of YouTube videos that show you how to do this, and also the kits that are available to buy will come with instructions.
A professional repair
For extensive delamination, or if you prefer peace of mind, hiring a professional is possibly the best option. They will inspect the extent of the damage to determine the best course of action. In severe cases, they may remove and replace the affected floor sections entirely to ensure a long-lasting solution.

Preventing it in the first place
Prevention is always better than cure. Take the time to regularly inspect your motorhome’s seals, windows and doors for leaks to make sure water can’t seep into your motorhome. You can also use a dehumidifier to reduce the moisture levels inside the motorhome, particularly if you’re storing it for long periods. Try to avoid placing excessive weight on specific areas of the floor, and check the floor periodically for early signs of delamination. All these steps will help to extend the life of your motorhome’s floor and hopefully avoid costly repairs in the future.
Floor delamination in motorhomes is a fairly common but manageable issue - and now that you know what causes it, you can address it promptly, keeping your motorhome in great condition and enjoying your travels without a creaky floor. Whether you choose to fix it yourself or hire someone to do it, the key is to act quickly before the problem escalates.
So, if you feel that tell-tale bounce under your feet, don’t ignore it - take the necessary action as soon as you can!


